Smart Home Device Calibration: 5 Essential Tips for Peak Performance in 2026
5 Essential Smart Home Device Calibrations for Peak Performance in 2026: An Insider’s Guide to Avoiding Common Pitfalls
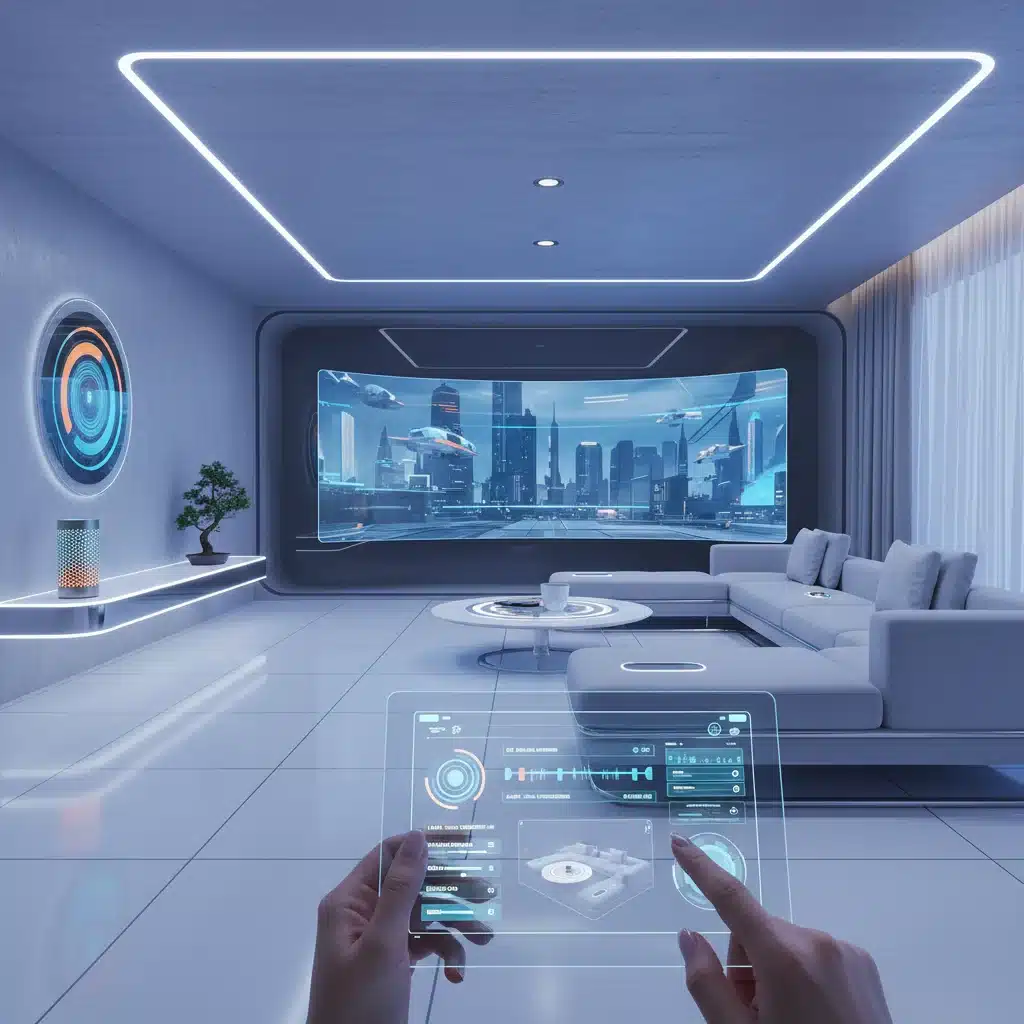
The dawn of 2026 finds our homes more interconnected than ever before. Smart home technology, once a futuristic dream, is now an indispensable part of daily life, offering unparalleled convenience, security, and energy efficiency. From intelligent lighting systems that adapt to your mood to sophisticated security cameras that monitor your property with unparalleled precision, smart devices are continually evolving. However, the true magic of these innovations isn’t just in their existence, but in their optimal performance. This is where Smart Home Calibration becomes not just beneficial, but absolutely essential.
Many users invest heavily in cutting-edge smart gadgets only to find them underperforming, exhibiting glitches, or failing to deliver on their promised potential. The culprit? Often, it’s a lack of proper calibration. Just like a finely tuned instrument, smart home devices require regular adjustments and fine-tuning to operate at their peak. Ignoring this crucial step can lead to a myriad of issues, from inaccurate sensor readings and delayed responses to energy wastage and security vulnerabilities. As we delve deeper into 2026, with an even greater reliance on these technologies, understanding and implementing effective Smart Home Calibration techniques is paramount.
This comprehensive guide will walk you through 5 essential smart home device calibrations that you absolutely need to know for 2026. We’ll explore why each calibration is vital, how to perform it effectively, and what common pitfalls to avoid. By the end of this article, you’ll be equipped with the knowledge to transform your smart home from simply functional to truly exceptional, ensuring every device works in perfect harmony and delivers the seamless, intelligent experience you expect.
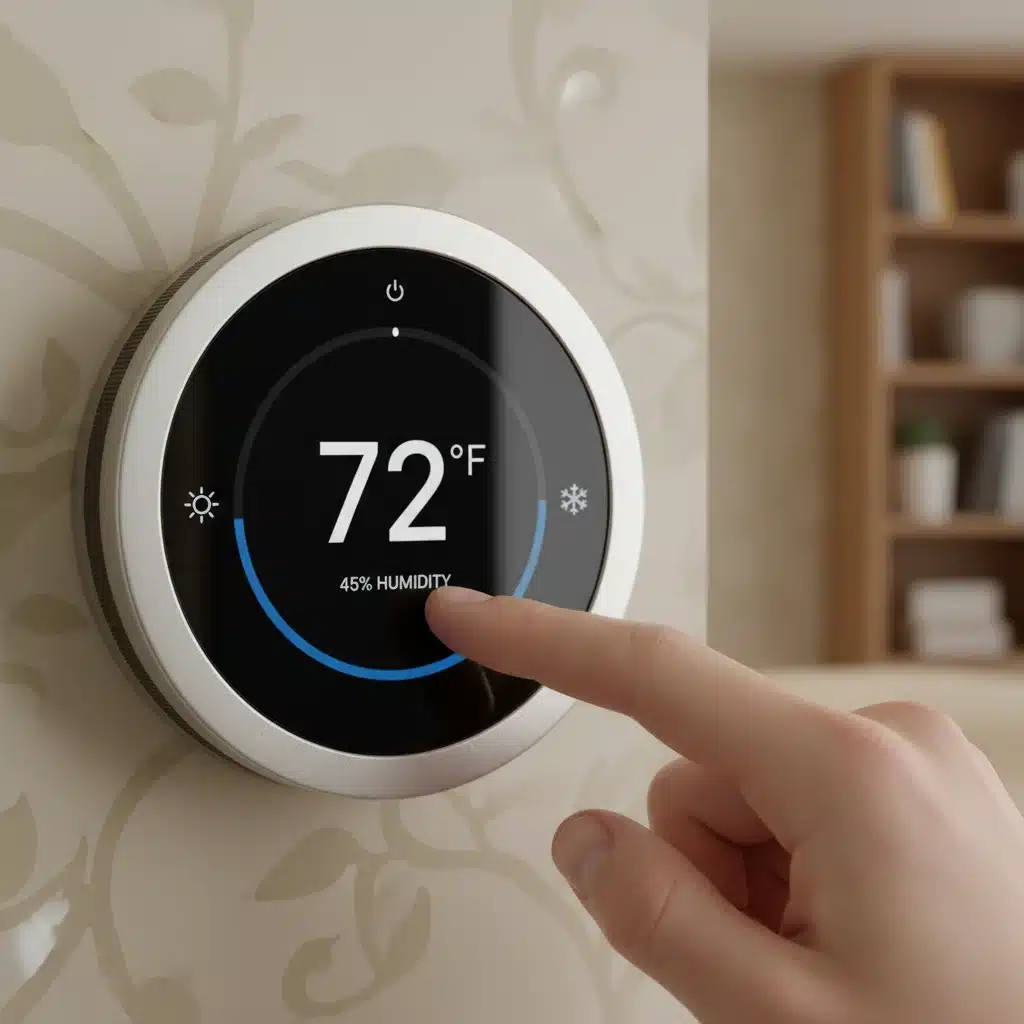
1. Optimizing Your Smart Thermostat: Precision Temperature Control
Your smart thermostat is arguably one of the most impactful smart home devices, directly influencing your comfort and energy bills. While it boasts advanced algorithms and learning capabilities, its effectiveness hinges on accurate sensor readings and proper scheduling. Without precise Smart Home Calibration, your thermostat might be heating or cooling your home unnecessarily, leading to discomfort and wasted energy.
Why Smart Thermostat Calibration is Crucial
An uncalibrated smart thermostat can have its internal temperature sensor slightly off, leading to a consistent discrepancy between the actual room temperature and what the thermostat reports. This can cause your HVAC system to run longer or shorter than needed, increasing energy consumption and potentially creating an uncomfortable living environment. Furthermore, without proper calibration, its occupancy sensors might misinterpret presence, leading to inefficient scheduling.
How to Calibrate Your Smart Thermostat for 2026
- Verify Sensor Accuracy: Use a reliable, external thermometer to compare its reading with your smart thermostat’s reported temperature. Place the external thermometer near the thermostat but not directly on it, and away from direct sunlight or drafts. Allow it to sit for at least 15-20 minutes for an accurate reading. If there’s a consistent difference of more than 1-2 degrees Fahrenheit (or 0.5-1 degree Celsius), your thermostat likely needs an offset adjustment.
- Adjust Temperature Offset: Most smart thermostats offer a setting to adjust the temperature offset. This allows you to manually correct any consistent discrepancies between its internal sensor and the actual room temperature. Consult your device’s manual or app for specific instructions on how to access and modify this setting.
- Review and Refine Schedules: Even the most advanced learning thermostats benefit from manual review of their schedules. After a few weeks of use, check the learned schedule in your app. Does it align with your actual occupancy patterns? Are there times when the system is running unnecessarily? Manually adjust setpoints and times to optimize energy savings and comfort.
- Test Occupancy Sensors: If your thermostat uses occupancy sensors, test their effectiveness. Walk in and out of the room where the thermostat is located and observe if the device registers your presence correctly. Some thermostats allow you to adjust the sensitivity of these sensors within their settings.
- Check for Drafts and Obstructions: Ensure your thermostat isn’t located near a drafty window, a heat source (like a lamp or TV), or in direct sunlight. These environmental factors can skew its readings. Relocate if necessary, or shield it from direct influences.
- Firmware Updates: Always ensure your smart thermostat’s firmware is up to date. Manufacturers frequently release updates that improve sensor accuracy, optimize algorithms, and enhance overall performance.
Common Pitfalls to Avoid
- Ignoring Small Discrepancies: Even a one-degree difference can significantly impact energy consumption over time. Don’t dismiss minor inaccuracies.
- Frequent Manual Overrides: Constantly overriding your thermostat’s schedule prevents it from learning your habits effectively. Calibrate the schedule instead.
- Placing Thermostat in Suboptimal Locations: A thermostat placed in an unrepresentative area of your home will never provide accurate readings for the entire space.
By diligently performing these Smart Home Calibration steps, you can ensure your smart thermostat delivers truly precise temperature control, maximizing both your comfort and energy savings in 2026.
2. Calibrating Smart Lighting Systems: Ambiance and Efficiency Perfected
Smart lighting has moved far beyond simple on/off control, now offering dynamic color changes, adjustable brightness, and sophisticated scheduling. However, to truly harness its potential for ambiance and energy efficiency, proper Smart Home Calibration of both individual bulbs and the overall system is key.
Why Smart Lighting Calibration Matters
Uncalibrated smart lights can result in inconsistent brightness across a room, inaccurate color rendering, or lights turning on/off at inappropriate times. This not only detracts from the desired aesthetic but can also lead to wasted electricity if brightness levels aren’t optimized or if occupancy sensors are misaligned.
How to Calibrate Your Smart Lighting for 2026
- Initial Brightness and Color Sync: When installing multiple smart bulbs in a single fixture or room, ensure they are all set to the same initial brightness and color temperature. Use the manufacturer’s app to group them and apply uniform settings. Periodically check for drift, especially after power outages.
- Scene Calibration: For pre-set scenes (e.g., ‘Movie Night,’ ‘Reading’), fine-tune the brightness and color for each individual bulb within the scene. What looks good during the day might be too bright at night. Test each scene at different times to ensure optimal ambiance.
- Motion/Occupancy Sensor Sensitivity: If your smart lights are linked to motion or occupancy sensors, calibrate their sensitivity and detection zones. Walk through the area to ensure lights activate when needed and, more importantly, turn off when no one is present. Adjust the sensor’s range and sensitivity settings within its accompanying app.
- Daylight Sensor Integration: If your system includes daylight sensors, calibrate them to accurately detect ambient light levels. This ensures lights only turn on or brighten when natural light is insufficient, maximizing energy savings. Test these sensors at various times of day and in different weather conditions.
- Scheduling and Geofencing Accuracy: Review your lighting schedules and geofencing settings. Ensure lights turn on/off according to your routine and location. Test geofencing by leaving and entering your home to confirm lights respond as expected. Adjust the geofence radius if lights are activating too early or too late.
- Zigbee/Z-Wave Mesh Network Optimization: For systems using mesh networks (like Zigbee or Z-Wave), ensure you have enough powered devices (repeaters) to create a robust network. A strong mesh network prevents delayed responses and dropped commands, which can often be mistaken for calibration issues.
Common Pitfalls to Avoid
- Ignoring Individual Bulb Settings: Treating all bulbs in a group as identical can lead to uneven lighting.
- Overlooking Environmental Factors: Reflections or shadows can interfere with motion/daylight sensor accuracy.
- Not Updating Firmware: Firmware updates often include performance enhancements for color accuracy and responsiveness.
By meticulously calibrating your smart lighting, you create an environment that is not only visually appealing but also incredibly energy efficient, a prime example of effective Smart Home Calibration.
3. Fine-Tuning Smart Security Cameras: Clarity and Alert Accuracy
Smart security cameras are your eyes on your property, providing peace of mind and crucial evidence if an incident occurs. However, their effectiveness is entirely dependent on proper Smart Home Calibration, ensuring clear footage, accurate motion detection, and timely alerts.
Why Smart Security Camera Calibration is Critical
A poorly calibrated camera might miss critical events, trigger constant false alarms, or provide blurry, unidentifiable footage. This defeats the purpose of having a security system and can lead to alert fatigue or, worse, a missed security breach.
How to Calibrate Your Smart Security Cameras for 2026
- Optimal Placement and Angle: This is the first and most crucial step. Position cameras to cover essential entry points and vulnerable areas without blind spots. Adjust the angle to minimize sky exposure (which can lead to overexposure) and avoid direct sunlight or strong backlighting during key viewing hours.
- Motion Detection Zones: Define specific motion detection zones within your camera’s field of view. Exclude areas with constant, irrelevant movement (e.g., busy streets, swaying trees, pet zones) to reduce false alarms. Focus on areas where actual threats would appear.
- Motion Sensitivity Adjustment: Fine-tune the motion sensitivity settings. Too high, and every rustle of leaves will trigger an alert; too low, and it might miss a person. Test different sensitivity levels by walking through the detection zone yourself and observing the results. Many cameras offer ‘human detection’ features – ensure these are enabled and calibrated.
- Night Vision Adjustment: Test your camera’s night vision capabilities. Ensure the infrared (IR) illuminators are not reflecting off nearby surfaces (like walls or windows), which can cause glare and obscure the image. Clean the camera lens regularly, as grime can significantly degrade night vision clarity.
- Audio Detection Thresholds: If your camera includes audio detection, calibrate its sensitivity. This prevents it from triggering on everyday household noises but ensures it catches unusual sounds like breaking glass or a smoke alarm.
- Alert Frequency and Notifications: Calibrate your notification settings. Decide whether you want a push notification for every event or only for specific types of detection (e.g., human detection only). Avoid notification overload to prevent ignoring actual alerts.
- Network Connectivity and Bandwidth: Ensure your cameras have a strong, stable Wi-Fi connection. Poor connectivity can lead to dropped frames, delayed footage, or complete loss of connection. If you have multiple cameras, ensure your network can handle the combined bandwidth, potentially requiring adjustments to your router’s QoS (Quality of Service) settings.
Common Pitfalls to Avoid
- Ignoring False Alarms: Consistently getting false alarms indicates poor calibration; don’t just silence notifications.
- Not Testing Night Vision: Night vision performance can drastically differ from daytime.
- Overlooking Network Issues: A camera is only as good as its connection.
With meticulous Smart Home Calibration, your security cameras will become a reliable, vigilant guardian of your home, providing clear, actionable intelligence when you need it most.
4. Ensuring Smart Locks and Access Control are Secure and Responsive
Smart locks offer unparalleled convenience and enhanced security, allowing keyless entry and remote monitoring of your doors. However, their security and responsiveness are contingent upon precise Smart Home Calibration, both mechanically and digitally.
Why Smart Lock Calibration is Essential
An uncalibrated smart lock might struggle to engage the deadbolt, drain batteries prematurely due to excessive motor strain, or even fail to lock/unlock reliably. Furthermore, any misconfiguration in access settings could inadvertently compromise your home’s security.
How to Calibrate Your Smart Locks for 2026
- Mechanical Alignment: Before any digital calibration, ensure the physical lock mechanism is perfectly aligned. The deadbolt should slide smoothly into the strike plate without resistance. If it snags or requires force, adjust the strike plate or door frame. A misaligned lock will put undue strain on the smart lock’s motor, leading to battery drain and potential failure.
- Door Sensor Calibration: Many smart locks include a door sensor to detect if the door is open or closed. Calibrate this sensor to ensure it accurately reports the door’s status. Test it by opening and closing the door slowly and quickly, verifying the app reflects the correct state.
- Auto-Lock Feature Tuning: If you use an auto-lock feature, calibrate the delay setting. Set it long enough to prevent accidental lockouts but short enough to ensure security. Test this feature thoroughly.
- User Access Management: Regularly review and calibrate your user access codes and permissions. Remove access for individuals who no longer need it. Ensure schedules for temporary access (e.g., for pet sitters) are correctly configured and expire as planned.
- Firmware Updates and Security Patches: Always keep your smart lock’s firmware updated. Manufacturers frequently release updates that include security enhancements, bug fixes, and performance improvements that are crucial for maintaining optimal security and functionality.
- Battery Level Monitoring: While not strictly a calibration, consistently monitoring battery levels is vital. A dying battery can lead to sluggish performance or complete failure. Set up notifications for low battery warnings.
- Network Connectivity Test: For Wi-Fi or hub-connected smart locks, ensure a strong, stable connection. Test the responsiveness of locking/unlocking commands from your app. If there’s a delay, it might indicate network interference or a weak signal.
Common Pitfalls to Avoid
- Ignoring Mechanical Issues: A smart lock can’t compensate for a faulty door or frame.
- Neglecting User Permissions: Outdated access codes are a significant security risk.
- Skipping Firmware Updates: These often contain critical security fixes.
By focusing on these Smart Home Calibration steps, your smart locks will provide reliable, secure, and convenient access control, making your home safer and smarter in 2026.
5. Optimizing Your Smart Hub & Network: The Backbone of Your Smart Home
The smart home hub and your home network are the central nervous system of your entire interconnected ecosystem. Without proper Smart Home Calibration and optimization, even the most advanced individual devices will struggle to communicate, leading to delays, dropped commands, and overall system instability.
Why Smart Hub & Network Calibration is Paramount
A poorly configured network or an unoptimized hub can create bottlenecks, interference, and unreliable connections. This can manifest as devices not responding, automation routines failing, or streaming issues, undermining the entire smart home experience.
How to Calibrate Your Smart Hub & Network for 2026
- Optimal Hub Placement: Position your smart home hub centrally within your home, ideally away from large metal objects, thick walls, and other electronics that could cause interference. This ensures maximum signal reach for all connected devices, especially those using Zigbee or Z-Wave, which rely on mesh networks.
- Wi-Fi Channel Optimization: Wi-Fi interference from neighboring networks can significantly degrade performance. Access your router’s settings and use a Wi-Fi analyzer app (available on smartphones) to identify the least congested Wi-Fi channels (typically 1, 6, or 11 for 2.4GHz). Switch your router to one of these channels to minimize interference.
- Router Firmware Updates: Keep your Wi-Fi router’s firmware up to date. Manufacturers regularly release updates that improve network stability, security, and performance, which directly impacts your smart home’s responsiveness.
- Quality of Service (QoS) Settings: If your router supports QoS, configure it to prioritize traffic for your smart home hub and critical devices (like security cameras). This ensures that even during heavy network usage, your smart home commands and data streams receive preferential treatment.
- IP Address Reservations: Assign static IP addresses (or DHCP reservations) to your smart home hub and other critical smart devices. This prevents them from being assigned a new IP address after a router reboot, which can sometimes cause temporary disconnection issues.
- Mesh Network Health (Zigbee/Z-Wave): For devices using Zigbee or Z-Wave, ensure you have enough ‘repeater’ devices (often mains-powered smart plugs or light switches) strategically placed to extend the mesh network and strengthen signal paths. Periodically check your hub’s network map (if available) to identify weak links.
- Regular System Reboots: Just like computers, smart hubs and routers benefit from occasional reboots. A monthly reboot can clear out temporary glitches and refresh network connections, improving overall stability.
- Review Automation Rules: Over time, you might accumulate many automation rules. Periodically review and calibrate these rules. Remove redundant or conflicting automations that could be causing unexpected behavior or unnecessary device activity.

Common Pitfalls to Avoid
- Ignoring Network Congestion: A crowded Wi-Fi channel will cripple your smart home.
- Outdated Router Firmware: This is a security and performance vulnerability.
- Placing Hub in a Closet: Obscured hubs lead to poor device communication.
By diligently calibrating and optimizing your smart home hub and network, you build a robust foundation for all your smart devices, ensuring seamless communication, swift responses, and a truly intelligent living experience in 2026. This is the ultimate form of Smart Home Calibration, ensuring every component works in perfect concert.
The Future of Smart Home Calibration: Proactive Maintenance and AI
As we look beyond 2026, the landscape of Smart Home Calibration is set to evolve even further. We can anticipate more proactive and AI-driven maintenance features embedded directly into our smart devices and hubs. Imagine a system that not only detects a misaligned smart lock but also suggests the exact adjustments needed, or one that automatically optimizes Wi-Fi channels and reconfigures mesh networks without user intervention.
The integration of advanced machine learning will allow smart homes to learn and adapt to environmental changes, user behaviors, and even device degradation over time, making real-time, autonomous calibration a reality. Predictive analytics will inform users of potential issues before they become problems, prompting preventative adjustments rather than reactive troubleshooting. This shift towards ‘self-calibrating’ smart homes will drastically reduce the manual effort required from homeowners, making the smart home experience even more seamless and reliable.
Furthermore, the rise of Matter and other universal smart home standards will simplify the calibration process across different brands and ecosystems. Instead of navigating multiple apps and interfaces, users will have a more unified approach to managing and fine-tuning their entire smart home, irrespective of the manufacturer.
Conclusion: Embrace Smart Home Calibration for a Superior Experience
The journey to a truly intelligent and efficient smart home doesn’t end with installation; it begins with continuous optimization. As we navigate the technological advancements of 2026 and beyond, the importance of Smart Home Calibration cannot be overstated. From the precise temperature control of your thermostat to the vigilant eye of your security cameras, and the seamless operation of your smart locks, every device benefits from regular fine-tuning.
By dedicating time to these essential calibration steps – optimizing your thermostat, perfecting your lighting, securing your cameras, fine-tuning your locks, and strengthening your network – you’re not just fixing problems; you’re unlocking the full potential of your smart home. You’re ensuring maximum energy efficiency, enhanced security, unparalleled convenience, and a truly harmonious living environment.
Don’t let your investment in smart technology fall short due to neglect. Embrace the practice of Smart Home Calibration as a routine part of your smart living. The rewards are significant: a more responsive, reliable, and ultimately more enjoyable smart home experience that truly enhances your daily life. Stay proactive, stay calibrated, and enjoy the intelligent future that 2026 has to offer.


